little snippets

Now that I have a nice camera, I am trying to take more pictures everyday so I can improve my photography skills.  Every so often I will try to share some "little snippets" of my daily life through photos on this blog. These are some pictures from a thai banquet we had at my house with friends this past weekend.  My dad made some amazing dishes, mostly from this book.
 
green papaya salad/chili peppers/tofu & sweet potato curry/seafood before/seafood after

first guest post: brandied cherries

Hello friends! I can't believe it's already Monday...my weekend was full of family, friends, yummy food, and crafty projects...and it flew by so quickly. I also made a very special early birthday present purchase for myself this weekend--I got my first DLSR camera! I am so excited to learn more about photography and have been snapping pictures of everything around me ever since I got it. Hopefully this means that there will be some improvement in the photography around here--I love that I have a space to share my photos as I learn...hopefully it will push me to practice and improve.

Today I'd like to share a post from my sweet friend (and future house-mate!) Alex. She is super smart and creative so I told her I would love if she would do guest posts every so often on here. Here is what she came up with!

Brandied Cherries

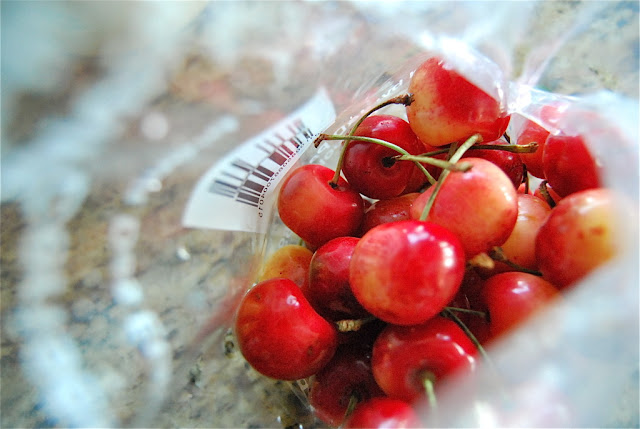
The best part of summer is enjoying fresh fruit in all forms. This summer my mom and I have been placing fruit in everything we eat: salad, yogurt, water, cake, and homemade ice cream. So we decided to follow a simple recipe we found in Sunset Magazine to turn ripe Rainier cherries into an awesome new topping for all our favorite things, it is an excellent twist on a maraschino cherry (and super easy to make too)!


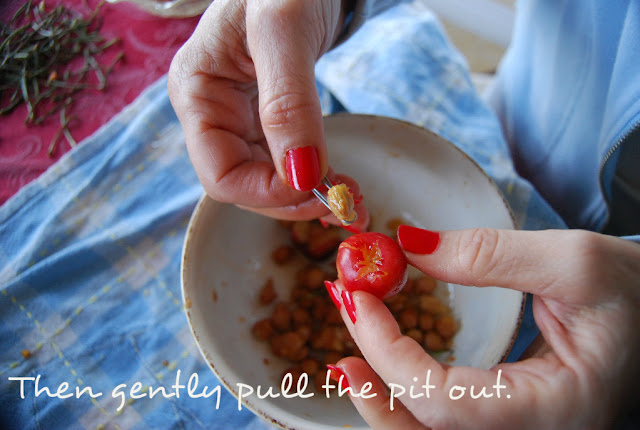
You can start with a fresh batch of Rainier cherries; we got ours from the local farmers market, and begin pitting the cherries. The pitting is a bit complicated so here is a little demonstration.


Next, you fill up your jars with the cherries and a few cinnamon sticks.

Bring your sugar, brandy, and 1 cups of water to a boil in a saucepan until the sugar has dissolved.


Once the jars and liquid have cooled, seal them with a lid and give them at least a month to absorb the liquid.


We are super excited to eat them on top of some homemade vanilla ice cream! 


(original recipe source)

string lanterns

This is a project I’ve been meaning to do for ages, but it’s a bit time consuming so it kept getting pushed to the end of the list. My friend got me the prettiest little white lanterns made out of string—I love them, so I decided to try to make some more myself. This project is messy and time consuming and sometimes a little frustrating (aren’t you excited to do it now?!), but the end result is well worth the glue covered hair/clothes/body (really, I promise). I made a string of different sized small balls and put them on white Christmas lights, but you could also make bigger lanterns or even just make a bunch in different sizes to hang from the ceiling without lights.
For this project you will need:
Roughly 4 oz glue
½ cup cornstarch
¼ cup hot water
Embroidery string (or yarn if you want something thicker)
Clear spray paint
Balloons (I used water balloons. If you want to make larger lanterns I would recommend those party balloons that come with a rubber band tied to them that are meant for bouncing…any idea what I’m talking about?...Anyways, those are usually rounder than regular balloons)
Vaseline (We didn’t have Vaseline so I used Crisco because I’m lazy…uh, I mean, innovative)
White string lights
Scissors
Paper towel
Clear or white wire (this wire should be stiff and not easily bent out of shape—you could use paper clips for this)

To prep mix together the glue, cornstarch and water until there are no clumps and blow up your balloons. If you don’t blow them up all the way, they will be more round.
 
Cover the balloon in Vaseline/Crisco so that the string doesn’t stick to the balloon once it’s dry.

Coat the string in your glue mixture as you wrap it around the balloon. Begin by wrapping vertically and slowly begin to wrap horizontally. Wrap until there are no large holes. If you are planning on putting lights into your lanterns, make sure there is a hole big enough to insert them.
 
Allow the lanterns to dry until they are completely hard.
Use a needle/knife to pop the balloons and pull them out carefully. You may need to use tweezers, depending on the size of the holes you left.  There will most likely be a bit of dried glue in the holes. If this bugs you, you can use a knife to carefully scrape it out.  It looks a little weird up close, but I decided to leave them on mine because it looks really nice when the light shines through them.
Next, spray paint each ball to give them extra strength.

While you're waiting for the paint to dry, cut your wire into pieces around 2 inches long.  Wrap them around the bases of your lights so that the ends stick out opposite sides.  Carefully insert the lights into holes that are just big enough to fit them.  Position the wire so that the lights can't be pulled out easily and you're done!

summer sunset playlist

 
Every summer Taylor makes a special "summer mix" that is the soundtrack to his summer.  I love the mix he made this summer and I thought it would be fun for him to contribute a bit to my blog, so we made this mix together (the majority of the credit should go to him, though).  Most of the songs are off of his summer mix but we changed/added a few songs so it would be a perfect combination of both of our tastes in music! Taylor says that this should be listened to at sunset, preferably driving around with the windows down :) We hope you like it!

life lately [instagram edition]


brainstorming project ideas/ani difranco concert in the park/post-picnic swinging/experimenting with new camera toys/dusting off my uke/popsicles and hammocking/refreshing summer drinks with mint from the garden

[p.s. you can follow me on instagram @ella_michelle]